
Top 5 Tips for 3D Printing TPU
- sabinagg
- Jan 24, 2023
- 4 min read

Updated: Aug 18, 2023
With the announcement that Markforged composite 3D printers can now print flexible material, we wanted to share with you our insider tips on how to use TPU.
Check out our top five tips for 3D printing TPU on Markforged 3D printers.
Bit of background first….
Why flexible matters
Markforged Smooth TPU 95A (Thermoplastic Polyurethane with 95A shore hardness) is a rubber-like material for functional parts that require flexibility or impact-absorption, including
Protective coverings, drive belts, pulleys, gaskets, pipe fittings, caps, panels and grips
Prototyping and design iterations
3D printing parts is not only an efficient way to make high quality flexible parts in low volumes, but it is also ideal for producing parts that you cannot purchase off-the-shelf or parts that require specific dimensions.
Plus, Markforged Smooth TPU is abrasion resistant, can withstand impacts and is resistant to many chemicals.
Is printing in flex easy?
In short, no! Using and printing with flexible materials on an extrusion machine is not a straight-forward task. A material that is inherently bendy means that it can be tricky to manage consistently through the print process. And it won’t be able to print every geometry under the sun – models requiring a lot of retraction and very thin walls are best to avoid.
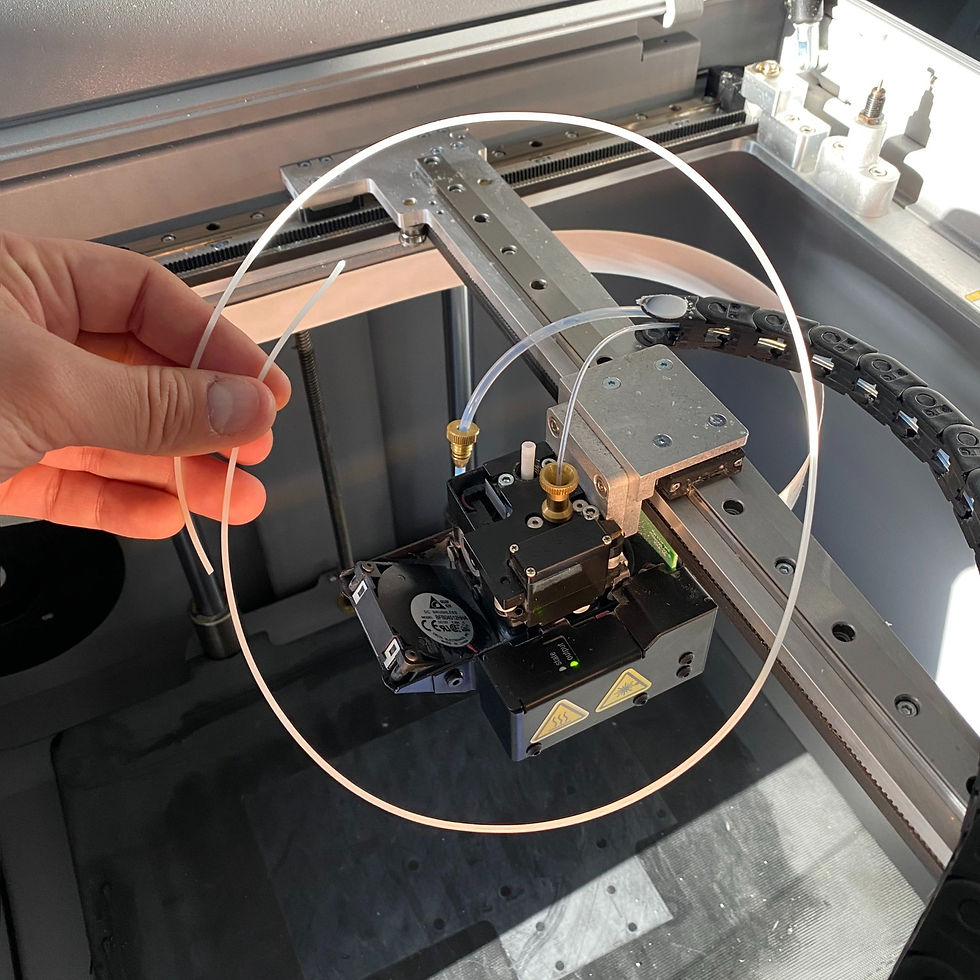
However, Markforged have engineered their machines to make printing TPU consistent and successful. Markforged developed the A3648 extruder which has a flow sensor that detects how much material goes through the Bowden tube to the plastic nozzle.
Right, how do I start to print with TPU?
Firstly, check that your printer is compatible with Smooth TPU 95A. The (Gen 2 model) Onyx Pro, Mark Two, X3, X5 and X7 3D printers are all compatible.

If you’re unsure if you have Gen 2, you can tell by your extruder’s appearance or drop us a line. It should have a A3648 extruder (see image)
Secondly, get the right equipment before you start! You need all four of the below to begin printing with Smooth TPU:
Update your printer to the latest firmware
At least 1x spool of Markforged Smooth TPU 95A (Black or White)
Tip! - TPU is Hygroscopic, so always keep Smooth TPU sealed in the dry box when loaded in the printer. If you store a spool after opening, ideally store in a spare dry box with the included two desiccant packs
Patience!
3D Printing with TPU – Top Five Tips
Always follow the TPU utility in the printer menu. The printer should automatically prompt when you load a TPU part, or you can navigate to the ‘Load Plastic’ utility and select S-TPU. It is a step-by-step guide to walk and talk you through the process of cleaning the printer and loading Smooth TPU. Our biggest tip is to follow the utility! This will prepare your 3D printer correctly, to achieve the best results.
1. Purge, purge and purge again
When using the composite purge filament, you only need the length of one and a half loops. When performing the “Clean head steps” do not press ‘Next’ until you repeat the same step at between 5 to 10 times, this will help you get rid of any Onyx residue.
2. Wiggle it, just a little bit
After completing the purge, when loading the TPU filament in the extruder, wiggle it a bit to reach the extruder gear. This helps to feed in the flexible material.
Once you feel the material at the extruder, tap “Next” to feed the filament through the Bowden tube up to the print head.
3. Prepare your plate and don’t overload it
Before starting a print, make sure to clean the build plate thoroughly to remove any debris or residue, and apply two layers of fresh glue. This will help the TPU stick to the build plate and prevent warping or other issues during the printing process.
Lots of parts printed in one build? TPU is not keen on multiple retractions so if you have a more complex geometry or lots of parts in one build, expect that you may experience some clogging.
We printed 1x timing belt, 3x gaskets and 1x cap in a single build which worked well, but just be conscious of not over-populating your build plate. Run multiple builds instead to reduce the risk of clogging.

4. Get a jam, don’t panic!
Don’t worry, the flexible qualities of TPU means you may well experience a jam. If you experience a mid-print clog, the printer is going to stop automatically to analyse the clog and will try to recover itself by purging material.
If this is auto recovery does not work it will send a notification to the registered email asking for human intervention.
If you get a clog, our recommendation is select ‘Reload’ instead of ‘Resume’ as this will guide you to the safe loading process for the TPU material.
Once you select ‘Reload’ be sure to click on ‘Load Material’ and ‘Same Spool’. This is the point where the patience comes in handy – you will need to complete the ‘Reload’ step more than once to achieve good flow of TPU to continue your print.
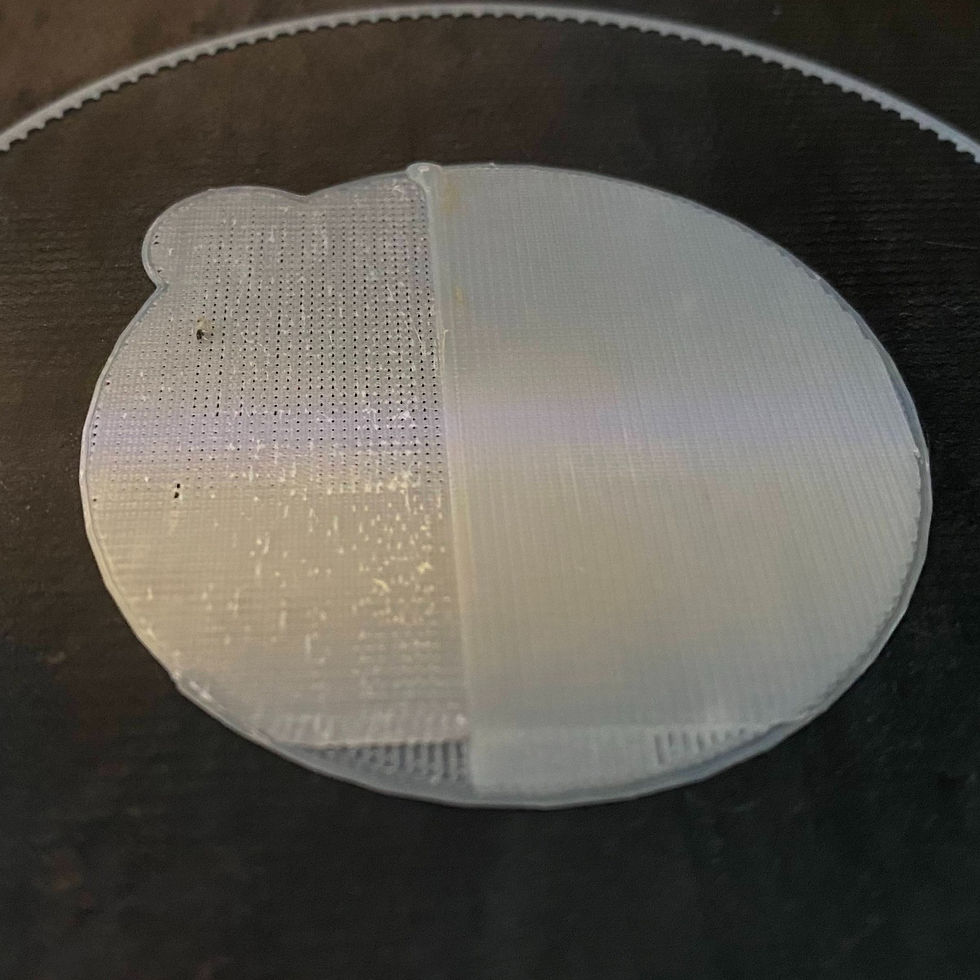
Image:
Left hand side of cap was when the printer automatically paused as it recognised a jam.
Right hand side of the cap is after user performed S-TPU pull, and the part recovered.
5. Back to basics
Use a brim! TPU can be prone to warping, so using a brim can help to keep the print in place and prevent it from lifting off the build plate. This will ensure that your print comes out with a smooth, even surface.
Try to minimise the features on your design, preferably to avoid multiple retractions. Avoid fine features for example: spikes or columns smaller than 2.5mm.
Follow the design recommendations by Markforged for minimum unsupported overhang angle and minimum post diameter.

You are now a master of flexible printing!
Once you have your finished parts and want to switch back to Onyx or Nylon, always perform the S-TPU pull after a print finish as this will help you to remove any hidden material in the nozzles or tubes.
Any questions – our Engineers are always on hand!

Call the CREAT3D Team on 0800 689 1011


Comments